NB: DOES NOT WORK WITH FIREFOX 29 AND LATER
More info:
- http://alien.slackbook.org/blog/setting-up-your-own-mozilla-sync-server/ (for Slackware users)
- http://docs.services.mozilla.com/howtos/run-sync.html
File synchronization (or syncing) in computing is the process of ensuring that computer files in two or more locations are updated via certain rules.
In one-way file synchronization, also called mirroring, updated files are copied from a 'source' location to one or more 'target' locations, but no files are copied back to the source location. In two-way file synchronization, updated files are copied in both directions, usually with the purpose of keeping the two locations identical to each other. (from wikipedia)
This note serves to remaind the steps to build a sync server of your own so that you can safely save your passwords and bookmarks, share them between all your mozilla devices, and sleep peacefully.
Virtualenv
This is a prerequisite of the python server itself. Install as follows:
tar xzf virtualenv-1.7.2.tar.gz
cd virtualenv-1.7.2
chown -R root.root .
python setup.py install
Install the server
Download and install the server:
mkdir -p /usr/local/server-full
cd /usr/local/server-full
hg clone https://hg.mozilla.org/services/server-full/ .
make build
Add the user and the group who will run the server:
groupadd sync
useradd -g sync weave
Configuring the server
Modify the file /usr/local/server-full/sync.wsgi. You should change PYTHON_EGG_CACHE to a secure location, for example:
mkdir -p /usr/local/var/tmp
os.environ['PYTHON_EGG_CACHE'] = '/usr/local/var/tmp/python-eggs'
You have to assign the write priviledges to apache here (later we'll run the server under apache):
mkdir -p /usr/local/var/sync/
chown -R weave.sync /usr/local/var/sync/
chmod -R 777 /usr/local/var/sync/
Modify the log location inside the development.ini file:
[handler_syncserver_errors]
class = handlers.RotatingFileHandler
args = ('/usr/local/var/sync/sync-error.log',)
level = ERROR
formatter = generic
As you can see from sync.wsgi the rest of the configuration is loaded by the file development.ini, which in turn calls the actual config file "sync.conf", which is stored in the etc/ folder and uses SQLite as the default backend. By the way you can choose a different config file among the samples files located in the etc/ folder, expecially if you are going to use an alternative backend such as MySQL or LDAP.
Configuring SQLite as backend
Edit the file /usr/local/server-full/etc/sync.conf and adjust to your needs. This is my sync.conf file. be carefull to set up the fallback_node to the address of your apache's virtualhost and the location of the sqluri, where the SQLite db will be stored.
[global]
clean_shutdown = false

[captcha]
use = false
public_key = xxxxxxxxxxxxxxxxxcopy here your google public key
private_key = xxxxxxxxxxxxxxxxand your google private key here only if you enable captcha
use_ssl =true

[storage]
backend = syncstorage.storage.sql.SQLStorage
sqluri = sqlite:////usr/local/var/sync/sync.db
standard_collections = false
use_quota = true
quota_size = 5120
pool_size = 100
pool_recycle = 3600
reset_on_return = true
display_config = true
create_tables = true

[auth]
backend = services.user.sql.SQLUser
sqluri = sqlite:////usr/local/var/sync/sync.db
#sqluri = sqlite:////tmp/test.db
pool_size = 100
pool_recycle = 3600
create_tables = true
# comment out to disable the creation of new accounts
# allow_new_users = false

[nodes]
# You must set this to your client-visible server URL.
fallback_node = https://sync.mydomain.net

[smtp]
host =
port = 25
sender = postmaster@mydomain.net

[cef]
use = true
file = syslog
vendor = mozilla
version = 0
device_version = 1.3
product = weave
Testing the server
Now run the server using paster and the provided “development.ini” file.
# cd /usr/local/server-full
# bin/paster serve development.ini
Starting server in PID 3034.
serving on http://10.0.0.2:5000
Running the server behind apache
Installing the module
- Info: http://code.google.com/p/modwsgi/
- Version 3.4
The built-in server should not be used in production, as it does not really support a lot of load. So you may want to put it behind apache.
cd /usr/local/src
wget and untar sources
./configure \
    --with-apxs=/usr/local/apache/bin/apxs \
    --with-python=/usr/bin/python
make
make install
Now you should have mod_wsgi installed under the apache's modules sub-directory.
Configuring the virtual host
Create a file /etc/httpd/extra/httpd-wsgi.conf and define the apache virtualhost:
<VirtualHost *:80>
 ServerName sync.myserver.net
 Redirect permanent / https://sync.myserver.net
</VirtualHost>

<VirtualHost *:443>
 Include /path/to/ssl-stuff.conf
 ServerName sync.myserver.net
 DocumentRoot /usr/local/server-full
 WSGIProcessGroup sync
 WSGIDaemonProcess sync user=weave group=sync processes=2 threads=25
 WSGIPassAuthorization On
 WSGIScriptAlias / /usr/local/server-full/sync.wsgi
 CustomLog /var/log/httpd/sync.myserver.net-access.log combined
 ErrorLog /var/log/httpd/sync.myserver.net-error.log
 <Directory /usr/local/server-full>
 Require all granted
 </Directory>
</VirtualHost>
Remember to include the file which defines the wsgi virtual host:
# Act as a reverse proxy to the Mozilla Sync server:
Include /etc/httpd/extra/httpd-wsgi.conf
Connecting firefox to your own server
Your server should be able to receive connection from all your firefox installed in your PCs and android tablets and phones :)
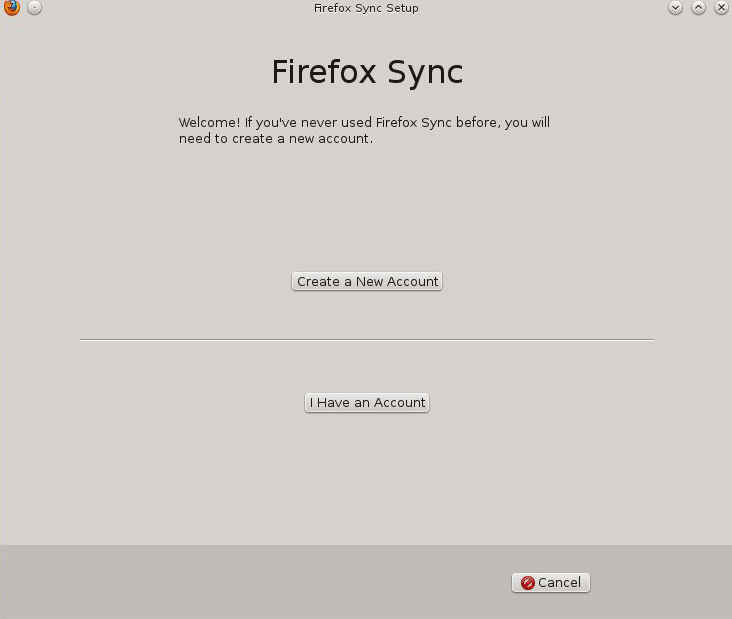
Select Tools->Set up Sync...

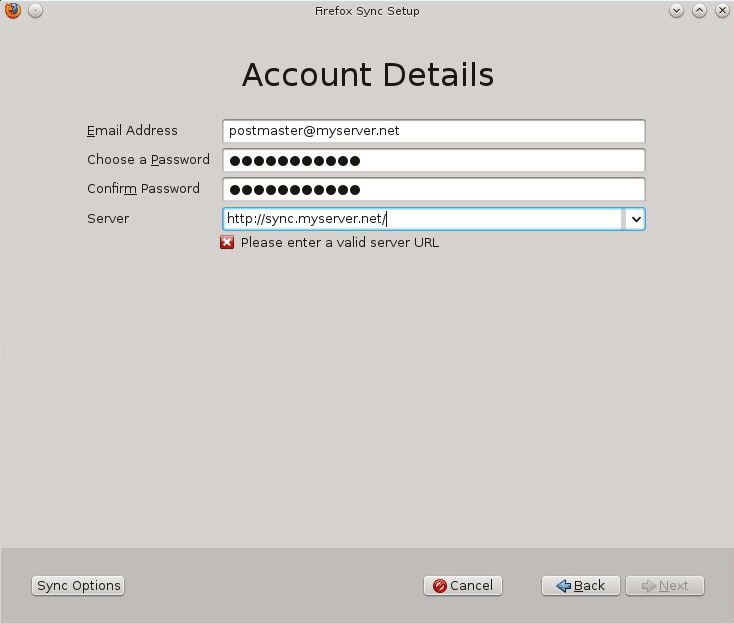
The first time you have to create a new account, in that case click on "Create a new Account". Fill the form. Select "Use a custom server" and use the address of your virtualhost.

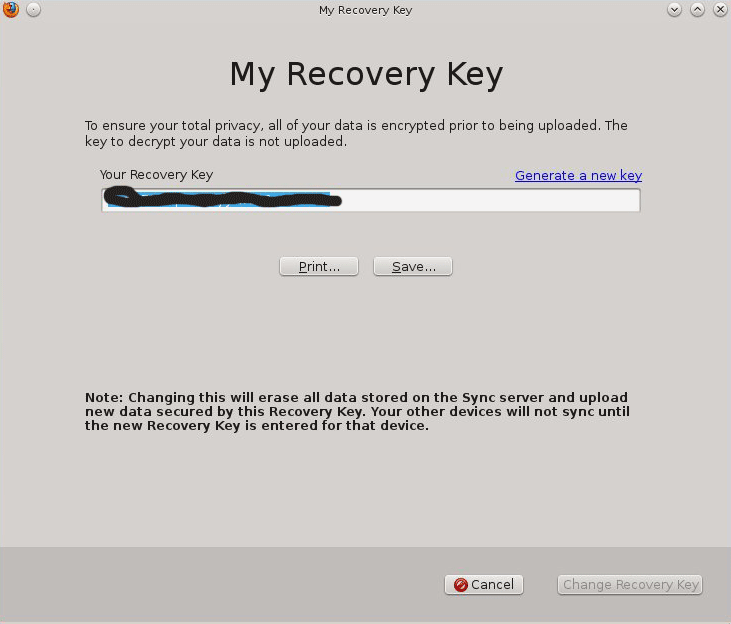
In case you have to pair a device, the most common way to do this is to use, on the new device, the unique Recovery Key which was generated when you created the account. To get that key go to Edit->Preference->Sync and select "Manage Accont"->My Recovery Key from the menu. Save the key in a place where you can always retrieve it in case you have to subscribe a new device to your newly created account.

In the new device (the one that you are going to pair) select Tools->Set up Sync. Click on "I have an account"

Select the "Advanced" procedure and fill the form with your account and the Recovery Key.
Troubleshooting
If your server does not work properly, the first thing to do is to visit about:sync-log in Firefox to see if there’s any error.
***
Last night my server stopped syncing, because the log file was rotated and assigned to root.apache instead of weave.sync:
[Sun Jul 29 09:55:59.126820 2012] [:error] [pid 29605:tid 4084992880] [client 123.456.789.123:31987] IOError: [Errno 13] Permission denied: '/usr/local/var/sync/sync-error.log'
So don't forget to adjust your logrotate file, so that the priviledges are restored. This is my logrotate file; note the chown command below the postrotate line:
/usr/local/var/sync/*.log {
    weekly
    missingok
    rotate 5
    compress
    delaycompress
    notifempty
    create 644 root apache
    sharedscripts
    postrotate
        /var/log/httpd/sync.myserver.net*.log
        chmod 644 /var/log/httpd/sync.myserver.net*.log
        /usr/local/apache/bin/apachectl restart
    endscript
}
Disabling new users
The default configuration of the server allows new users to create an account through Firefox’s builtin setup screen. This is useful during initial setup, but it means that anybody could sync against your server if they know its URL.
You can disable creation of new accounts by adjusting the config file:
[auth]
allow_new_users = false

